
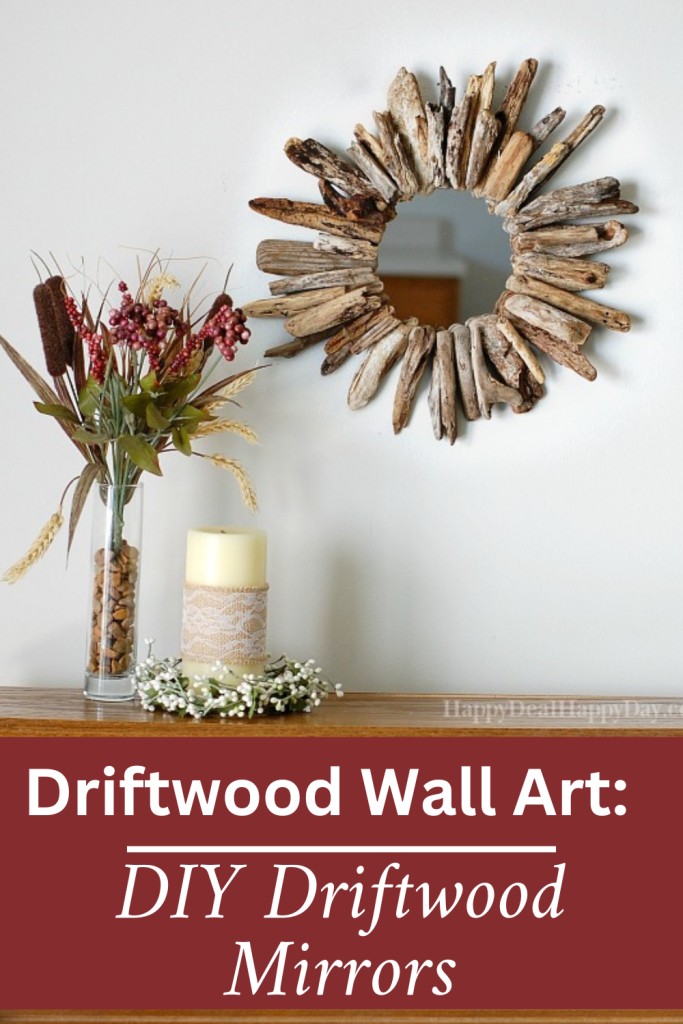
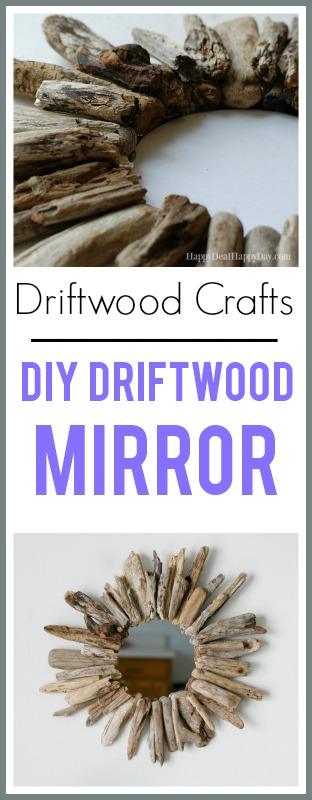
I have always loved nature, and love using natural things to decorate my home. Driftwood is one of those natural beauties that I love to find ways to display it in my home. Not only is this mirror on a wall in my home, so is this Simple Yarn Wall Hanging that also uses driftwood.
You can buy driftwood here, but I’m lucky enough to have a lake near me that has an abundance of driftwood that I can use.
Even if you have to buy driftwood, making your own driftwood mirror will save you a bunch of money. Compare this project to some already-made driftwood mirrors over on Amazon – some cost over $100! Yes, those mirrors are much bigger, but you could choose to make yours bigger than the one I’ll show you below. You can get larger mirrors at a thrift store, remove the framing, and replace it with driftwood that you gather or buy. You’ll have a gorgeous focal point for your living room or family room and you’ll be proud that you made it instead of spending way more to buy it.

Materials needed to make Driftwood Mirrors:
- Drift Wood (if you don’t have a beach near by with access to free wood, you can purchase it on Amazon.)
- 8 or 9 inch round mirror
- Hot glue gun
- Card Stock
- 6.5″ round template
- tape
Instructions to make Driftwood Mirrors:
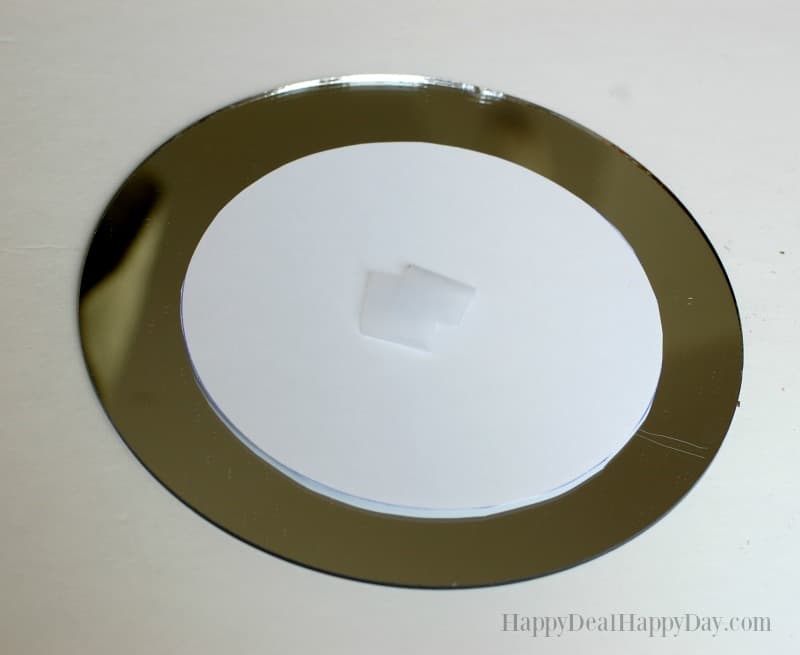
- Start off by finding a bowl that was 6.5″ in diameter – a bit smaller compared to the 9″ round mirror I had (which were left over from my wedding decor from 17 years ago!) I traced the bowl and cut out the circle.
2. Use one piece of tape and lightly pressed it onto the mirror so that it would stay in place. This paper circle now serves as a border that I can use to know where to glue the driftwood so that it will make an even circle. This paper will be removed later on.

3. Next, get out your driftwood and lay it out into one layer to get a general idea of how you want it to look before you start gluing.

4. When you are satisfied with the driftwood’s placement, get your hot glue gun and start attaching each piece.
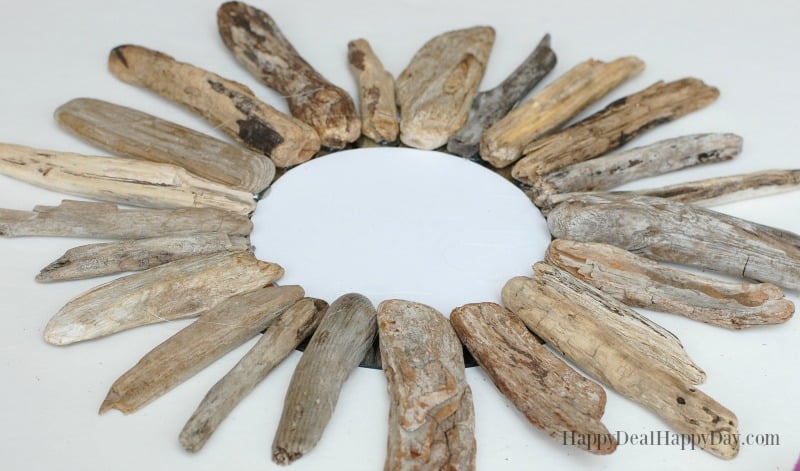
5. Here is my example after one layer. I wasn’t satisfied with how it came out and decided it needed a second layer of shorter driftwood to make it more full.

6. I recommend adding a second layer of shorter pieces of driftwood and glue them on.
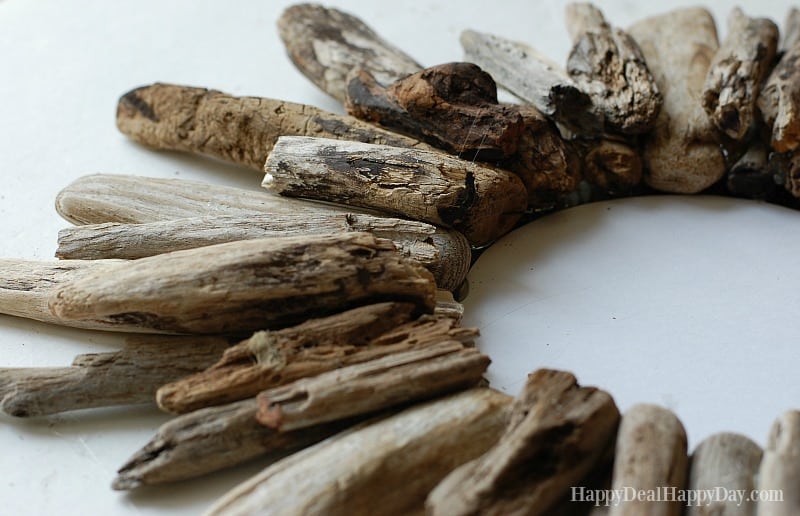
7. After you are done gluing, let it cool for a bit, and then clean up the “hot glue spider webs” that are always left behind.

8. Remove the paper circle that was used as an outline. After that, you have the complete driftwood mirror!
You can attach some twine on the back to hang it up. This size creates a mirror that isn’t very heavy, so you don’t need to be overly concerned about what kind of hardware used to hang it. If yours mirror is larger or heavier, then you will need some hanging wire and/or stronger hardware.

Want to continue to decorate your home with your own crafting skills? Check out more home decor ideas you can make or put together yourself!
Thrift Store Makeover: DIY Wall Decor
Bathroom Decor: Floating Shelves Above The Toilet Decor Idea
Inspiritional Printables You Can Print and Frame Today!
9 Thrift Store Flips For Bedroom Decor on a Budget
Repurposed Materials: Thrift Store Lampshade Into Small Charcuertie Board
Free Printable Wall Art – “Blessed”
How To Stain Wood: Tips for Beginners
Boho Decor With a Floral Hoop Wreath With Yarn Tutorial
How To Paint Kitchen Cabinets Without Sanding
How To Paint Your Bathroom Vanity – No Sanding Required!
Subscribe To My Newsletter
Want more frugal tips or DIY project inspiration? Plus an amazing amount of Amazon promo code deals? Get my newsletter with exclusive content I don't share anywhere else!


Kristy says
Oh my gosh I love drift wood! What a great idea!
Tara L says
So cute. I love all the DIY projects. I saw on Nicole & Jionni’s House Swap and saw some DIY home projects she did and they came out neat!
Debrashoppeno5 says
I love this mirror. It is easy to make and so stylish.
Maura says
Thank You Debra!!!
Michele Michael says
Nice job . I have a driftwood collection and love to use it for home decor. Thanks for posting at Funtastic Friday
Emily says
Your mirror looks great! What a fun way to use driftwood.