
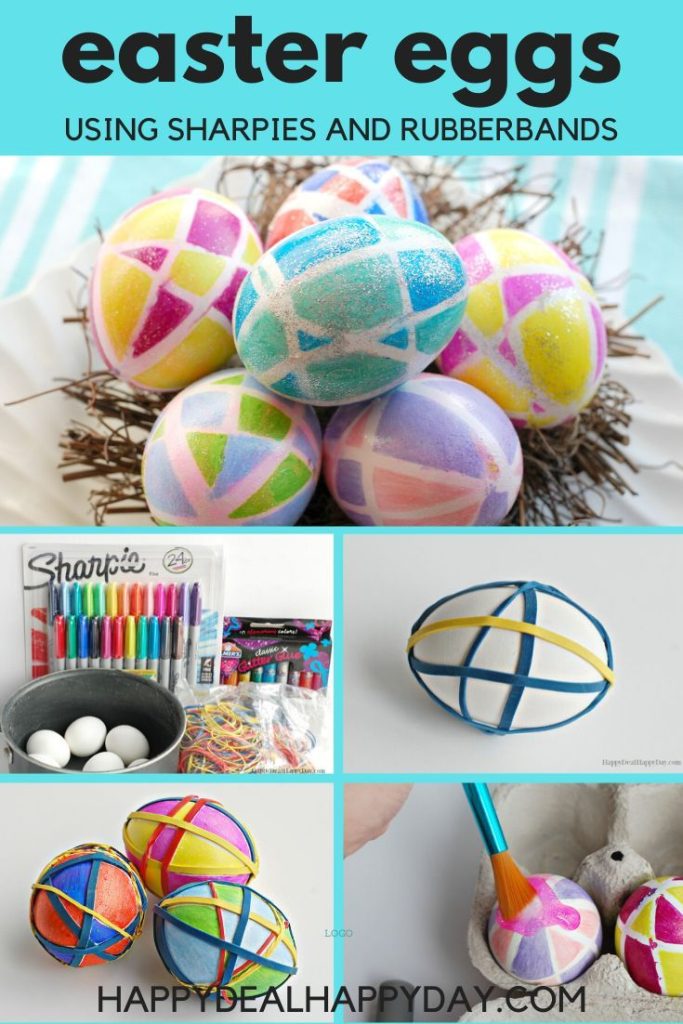
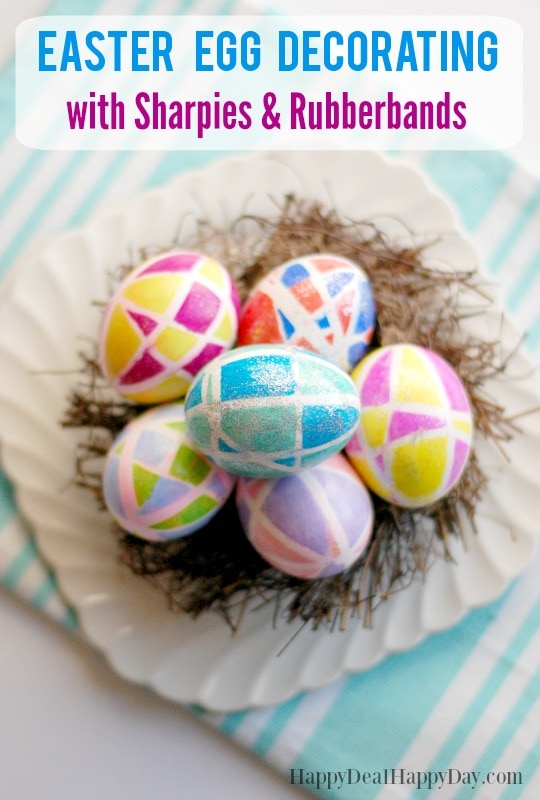
Here is a fun and colorful Easter egg decorating idea using Sharpies and rubber bands!
You can color eggs using different color schemes in some really cool patterns of geometric shapes. I covered it with glitter as well – because doesn’t glitter always make Easter egg decorations better!!?? 😉 This is a frugal, fun easter craft you could even do on plastic eggs or wooden eggs so that you can use them as decorations or in an Easter egg hunt every year!
Using this Easter egg decorating method gives your kids creative ways to color their eggs that don’t use the traditional teaspoon of vinegar and Easter egg dye or use food coloring.
Easter Egg Decorating Using Sharpies. #eastereggdecorating #eastereggs #uniqueeastereggs
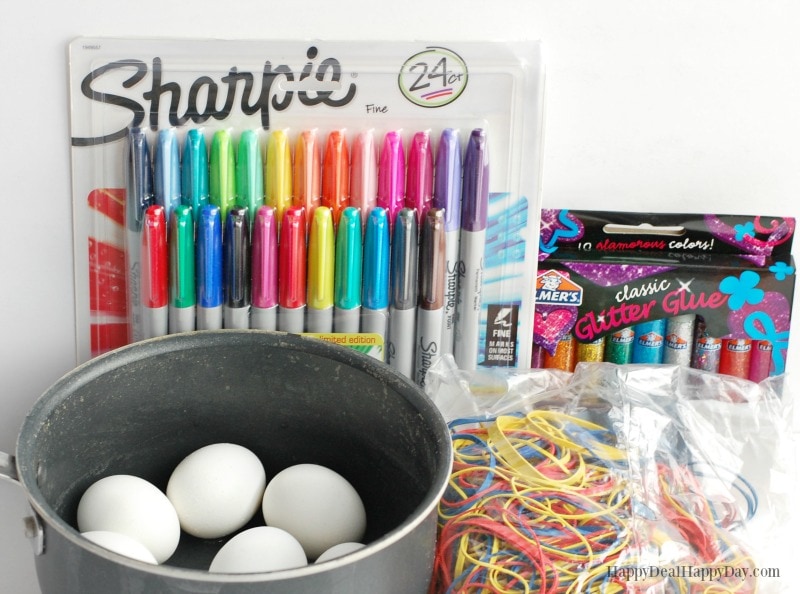
Materials Needed to make your own Easter Eggs with Sharpies, rubber bands, and glitter glue:
- hard-boiled eggs – you will want to use a white egg vs. a brown egg to get the brightest colors
- Sharpies or any permanent marker (paint pens would also work for this project.)
- rubber bands
- glitter glue
- First of all, you need to grab a dozen of eggs and hard boil them (10 minutes in boiling water.) Rinse them in cool water and dry them completely.
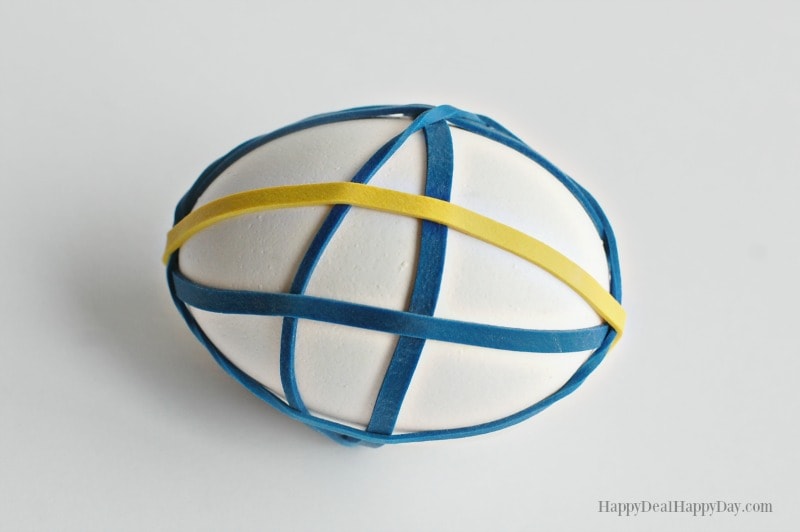
2. Then grab some rubber bands and wrap them around the eggs in such a way that will create a template of where you will add splashes of color in geometric designs.
3. Grab a sharpie, and first make an outline of the shape with the rubber band as your boundary. Then fill in that shape with that color. Do this again about every other shape with the same color. After you use one color, grab a second complimenting color and color in the 2nd half of the shapes. This is how you create a dyed egg using sharpies!
I chose to pick just 2 colors for each egg – and tried to color every other shape with one of the two colors. You may have the same color next to each other, and that’s ok. The shapes may not be evenly spread around the egg. Again, that’s ok – it gives the Easter egg designs unique to each beautiful egg.
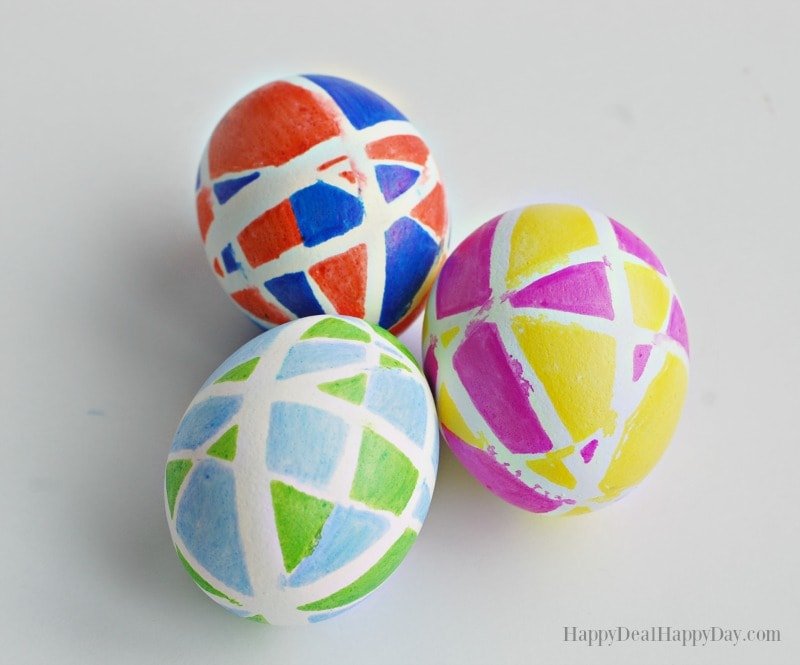
4. Now is the best part: Remove the rubber bands so that you can see what the egg looks like with its new design. The colors may bleed out a bit outside of where the rubber band was – and that is ok! These aren’t meant to be absolutely straight perfect lines – but more fun spontaneous splashes of color on your eggs to create their own unique pattern.
PRO TIP: Try using a metallic gold Sharpie or gold paint pen and color in the white border for more diverse and beautiful Easter eggs.
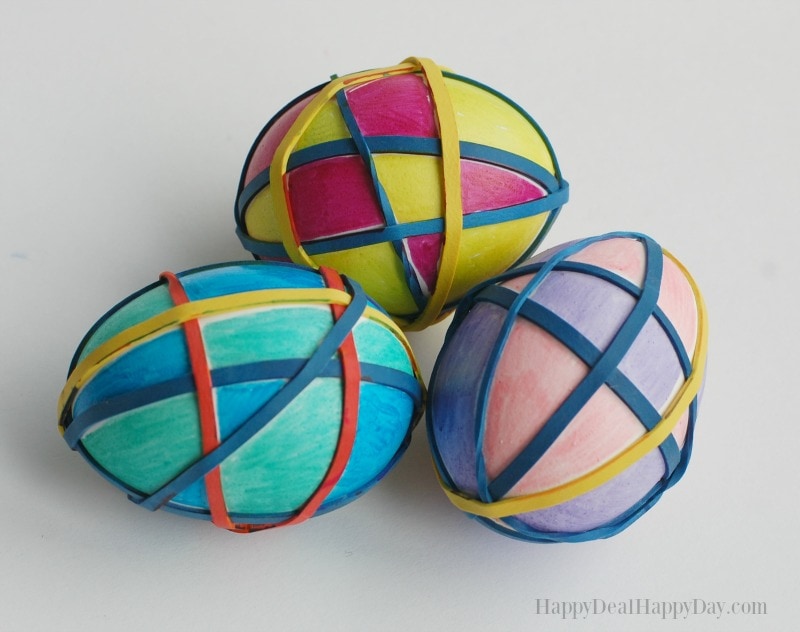
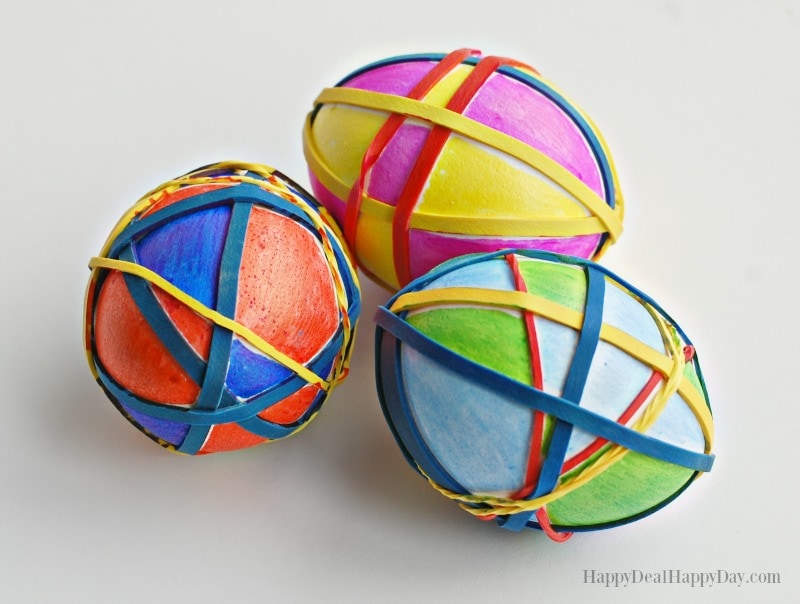
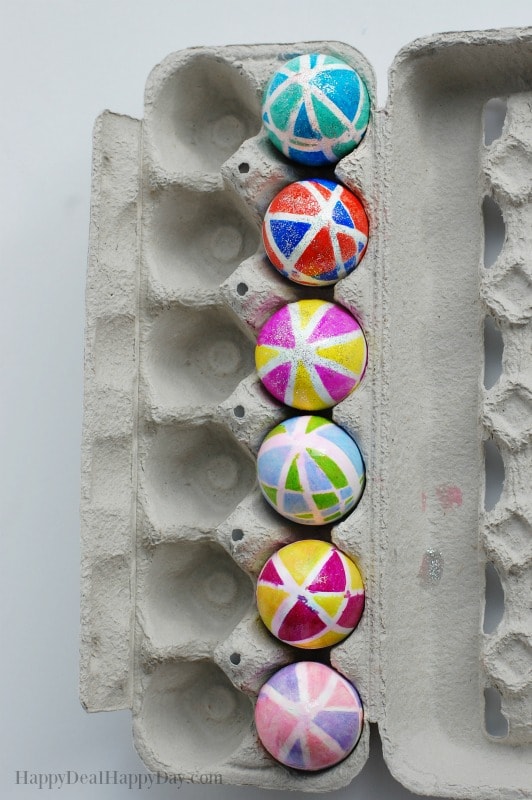
Here is a second group of eggs I colored with the rubber bands still on.
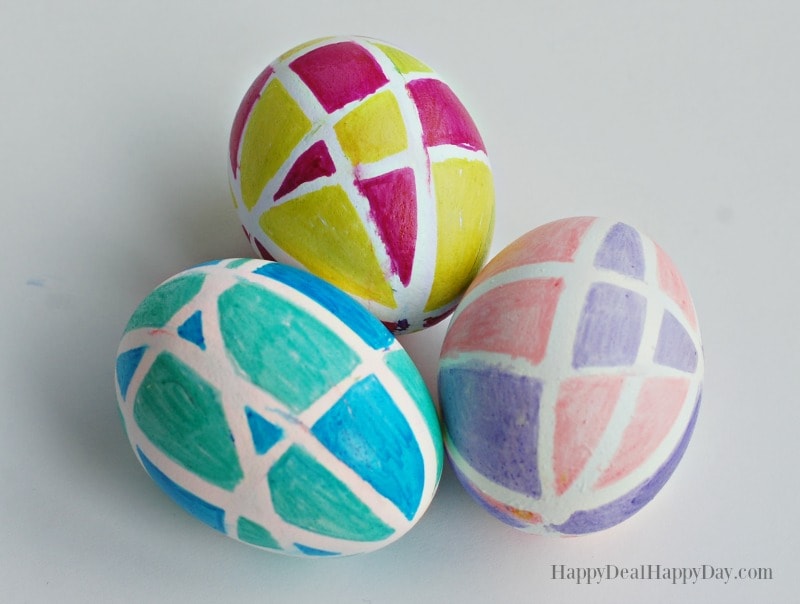
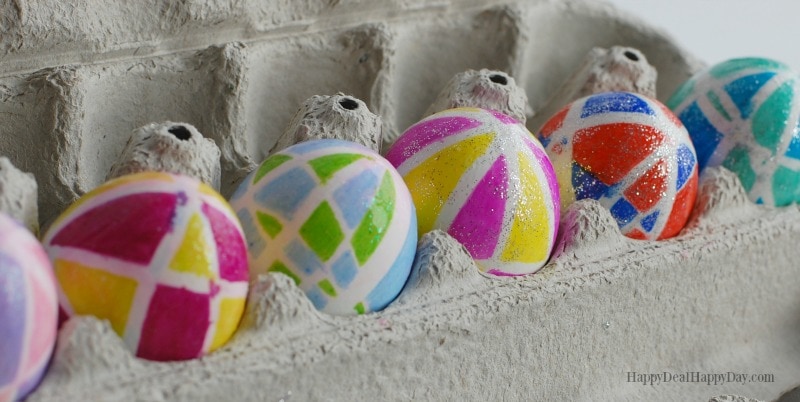
Here is the after of the second group of eggs when I pulled the rubber bands off.
I have two daughters that LOVE glitter. (And they have a mom that is just fine adding glitter to appropriate projects! Scared of using glitter with your kids? Read this post on how to contain the mess when using glitter!)
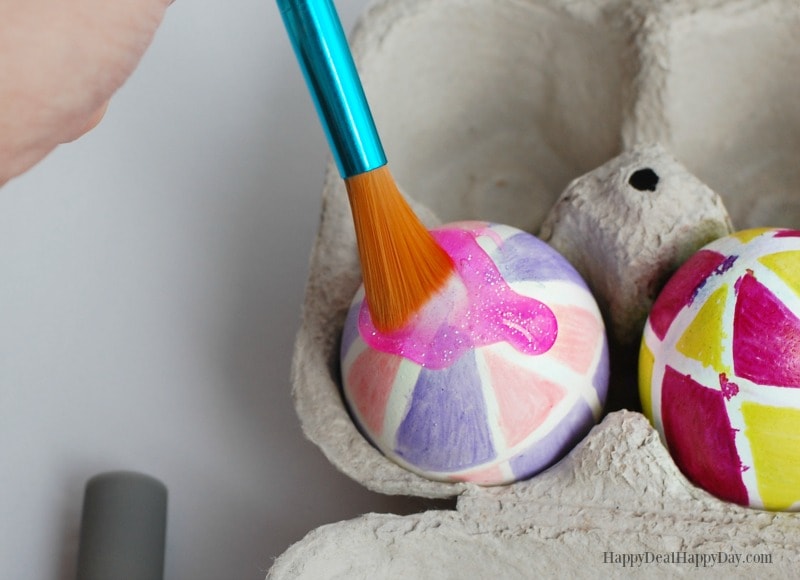
5. If you want to add some bling to your eggs, get some glitter glue and squirt some on top of the egg. Then, use a paint brush and spread it around top half of the egg – leave it in the egg carton while the top half dries.
For best results, when the top half dries (give it a few hours), flip the egg over and then add glitter glue to the other half. This way, you should always have a dry spot where the egg can touch the carton and not get stuck while the glue dries.
PRO TIP: Try using various glitter nail polishes (you may want to do this outside to avoid the potent smell.)
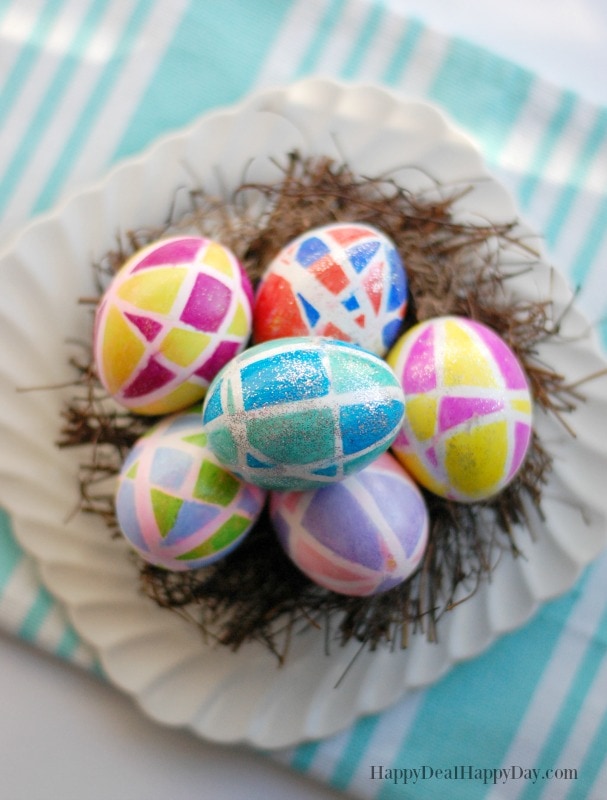
I used two different colors of glitter glue – pink glitter and silver glitter. I personally like the silver glitter glue better because it was more visible and sparkly.
When all of these eggs are put together, the bright colors covered in glitter look like an amazing springtime celebration decor piece! These are unique decorated eggs that aren’t the typical vinegar-dyed dipped eggs that give you just one solid color. These are a lot more fun – and actually less messy than the traditional dipped eggs!
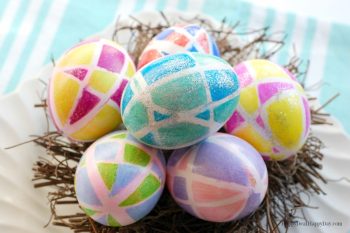
I love the random shapes that the rubber bands create, along with the contrasting color. Together this makes a unique way to get vibrant color for Easter egg decorating!
If you want to enjoy your patterns year after year, then do this on faux eggs that you can pull out each Easter. These are great for Easter party decorations, for Easter baskets, or in an Easter egg hunt the whole family can enjoy!
This Easter egg decorating idea is an EASY skill level in terms of Easter egg ideas. I hope you and your family enjoy some frugal fun and come up with creative ideas to use Sharpies to decorate this year’s eggs!
Easter Egg Decorating Using Sharpies & Rubber Bands

Easter Egg Decorating Idea Using Sharpies! No messy dyes used in this one – you just need rubberbands, sharpies, and glitter glue!
Ingredients
- hard-boiled eggs – you will want to use a white egg vs. a brown egg to get the brightest colors
- Sharpies or any permanent marker (paint pens would also work for this project.)
- rubber bands
- glitter glue
Instructions
- First of all, you need to grab a dozen of eggs and hard boil them (10 minutes in boiling water.) Rinse them in cool water and dry them completely.
2. Then grab some rubber bands and wrap them around the eggs in such a way that will create a template of where you will add splashes of color in geometric designs.
3. Grab a sharpie, and first make an outline of the shape with the rubber band as your boundary. Then fill in that shape with that color. Do this again about every other shape with the same color. After you use one color, grab a second complimenting color and color in the 2nd half of the shapes. This is how you create a dyed egg using sharpies!
4. Now is the best part: Remove the rubber bands so that you can see what the egg looks like with its new design. The colors may bleed out a bit outside of where the rubber band was – and that is ok! These aren’t meant to be absolutely straight perfect lines – but more fun spontaneous splashes of color on your eggs to create their own unique pattern.
PRO TIP: Try using a metallic gold Sharpie or gold paint pen and color in the white border for more diverse and beautiful Easter eggs.
5. If you want to add some bling to your eggs, get some glitter glue and squirt some on top of the egg. Then, use a paint brush and spread it around top half of the egg – leave it in the egg carton while the top half dries.
For best results, when the top half dries (give it a few hours), flip the egg over and then add glitter glue to the other half. This way, you should always have a dry spot where the egg can touch the carton and not get stuck while the glue dries.
PRO TIP: Try using various glitter nail polishes (you may want to do this outside to avoid the potent smell.)
Looking for more fun spring craft ideas? Check these out:
Easy DIY Homemade Melt & Pour Lemon Poppy Seed Soap
Spring Paper Flower Topiary DIY
Easy DIY Homemade Melt & Pour Lavender Rose Soap
Did you try this Easter egg decoration idea? If so, tell us about it in the comments below! Especially if you did something a little bit different like using acrylic paint pens instead, adding polka dots with sharpies, added temporary tattoos, or just have a favorite easter egg that you want to share!


Leave a Reply